
A note about pre-sale items
We’re sorry. Pre-sale items cannot be purchased with other products. Please complete your purchase first before continue.

It’s Morgan again from The Patient Mom blog and I am excited shout that summer is here! For me, that means weekends at the lake, ice cream outings, and of course I’m switching up my mantle.
If you have been following along on my personal blog and my guest posts with Decocrated then you know how much I love a good holiday mantle; especially when I get to show off my craftiness. That being said, I am LOVING my new double layered, patriotic wood bead and yarn garden.
If you have mastered the yarn tassel and yarn pom-pom then this DIY will be a breeze. But don’t worry, if you are new to crafting with yarn I will walk you through the process below. So gather up your supplies and get ready to have some fun!

Begin by making multiple yarn pom-poms with your red and blue yarn. I made 12 total; 6 of each color. If you have never made a yarn pom-pom, here is a quick tutorial:
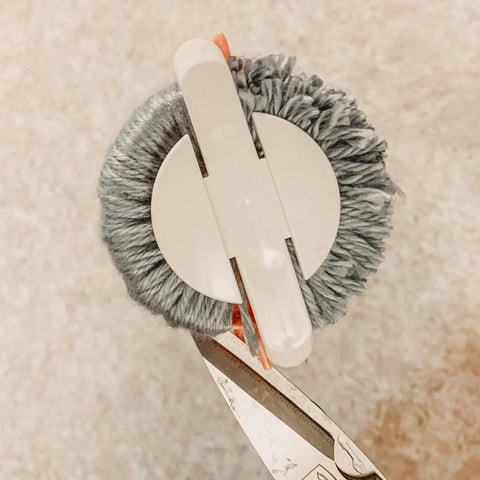
1. Wrap yarn around both sides of pom-pom maker until desired thickness.

2. Close pom-pom maker and cut the yarn along the outside edge.
3. With the cut yarn still in the pom-pom maker, tie another piece of longer yarn around the pom-pom maker and tie tightly.
4. Remove pom-pom from pom-pom maker.

5. Trim up the yarn and fluff each pom-pom as needed.
Next, make multiple yarn tassels with the red and blue yarn. I made 14 total; 7of each color because i wanted this garland to be slightly longer than the pom-pom garland.

2. When done wrapping, slide a piece of yarn under the wrapped yarn and tie in a knot.

3. Slide the yarn off the book.

4. Lay the yarn down vertically and tie another piece of yarn around the entire bunch about ¼ of the way down.

5. Slide scissors through the loop and cut through the bottom of the string.

6. Trim so the tassel is even in length.

Start adding wood beads to a long piece of string (think about the length where you plan to hang it) in a pattern.

The pattern I used was:
1 small - 1 medium - 1 small - 1 large - 1 small - 1 medium - 1 small
After you complete each pattern of beads, add a pom-pom/tassel and then repeat the bead pattern.

Repeat this process until the Garland is the desired length. Tie off the ends by looping the string and knotting through the last bead (so they won’t fall off).

Clean up the yarn pom-poms and tassels so they look great.
Now it is time to hang and enjoy!